
Low water pressure in your kitchen sink is most commonly caused by a clogged aerator, a partially closed shut-off valve, mineral deposit buildup inside the supply lines, a failing cartridge or faucet valve, or a pressure drop from the main water supply line. In most cases, the fix is straightforward and does not require a licensed plumber.
If you turn on your kitchen faucet and the flow comes out as a weak trickle instead of a steady, full stream, the problem is almost always traceable to one or two specific components in your kitchen’s plumbing.
The good news is that kitchen sink water pressure issues are among the most DIY-friendly plumbing repairs in the home. This guide walks through every verified cause, explains how each one restricts flow, and provides clear steps to restore normal pressure.
Understanding How Kitchen Sink Water Pressure Works
Water pressure is the force that pushes water through your home’s supply lines and out of the faucet spout. It is measured in PSI (pounds per square inch). Normal residential water pressure ranges between 40 PSI and 80 PSI, with 60 PSI considered the household ideal. The International Plumbing Code (IPC) and most municipal water authorities recommend maintaining pressure within this range for safe, functional operation.
Water travels from the municipal water main or a private well pump into your home through the main water supply line. From there it branches into hot and cold supply lines that feed individual fixtures. At the kitchen sink, water passes through a shut-off valve, travels up the supply tubes, enters the faucet body, moves through the cartridge or ball valve, and exits through the faucet aerator at the spout tip.
A restriction at any single point in this chain reduces the pressure and flow you experience at the tap. Knowing which component is responsible is the key to a fast, accurate repair.
The Role of PSI in Kitchen Sink Performance
When your kitchen faucet delivers water below approximately 1.0 GPM (gallons per minute), the flow is noticeably weak for rinsing dishes, filling pots, or running the garbage disposal effectively. Most standard kitchen faucets are rated for 1.5 GPM to 2.2 GPM under normal pressure. WaterSense-certified faucets from the U.S. Environmental Protection Agency (EPA) are rated at 1.5 GPM or less by design, but they still deliver adequate pressure through optimized aerator technology. Any flow below 1.0 GPM indicates a restriction problem, not an efficiency feature.
Hot vs. Cold Side Pressure Differences
One of the most useful diagnostic clues is whether the low pressure affects only the hot water side, only the cold water side, or both. If only the hot side is weak, the problem often lies in the water heater, a failing cartridge on the hot inlet, or a partially closed valve at the heater. If only cold water is weak, the issue is likely in the cold supply line or the cold-side cartridge. If both sides are equally weak, the restriction is in a shared component such as the aerator, the faucet body, or the main supply before it splits.
The Main Causes of Low Water Pressure in a Kitchen Sink
Clogged or Blocked Faucet Aerator
The faucet aerator is the small mesh screen device threaded onto the tip of the faucet spout. It mixes air into the water stream to create a smooth, splash-free flow. Because it sits at the very end of the water’s path, the aerator collects everything that has made it through the pipes: mineral deposits, limescale, sediment, iron particles, and tiny debris.
In areas with hard water, which is water with high concentrations of calcium carbonate and magnesium, aerator clogging is the number one cause of low kitchen sink pressure. The Water Quality Association (WQA) estimates that more than 85% of U.S. homes have hard water to some degree, making this an extremely widespread issue.
A clogged aerator is the first thing to check when pressure drops at a kitchen faucet, especially if the pressure drop was gradual over weeks or months rather than sudden.
Signs of a clogged aerator:
- Water flow is weak but pressure elsewhere in the house is normal
- The stream is uneven, splashing, or comes out at an angle
- White or yellowish crust is visible around the spout tip
- Pressure improves noticeably when the aerator is removed and the faucet is run without it
Mineral Deposit Buildup Inside Supply Lines and Faucet Body
Beyond the aerator, mineral scale or limescale buildup can accumulate inside the brass faucet body, the cartridge housing, and the flexible braided supply hoses that connect the shut-off valves to the faucet inlets. This buildup narrows the internal diameter of the water pathway over time, which progressively reduces flow.
Galvanized steel pipes, common in homes built before the 1970s, are particularly vulnerable to internal corrosion and rust buildup that narrows the pipe bore significantly over decades. If your home has older galvanized plumbing and you experience consistently low pressure at multiple fixtures, the pipe interior may be severely restricted and full repiping may be the only lasting solution.
Copper pipes and cross-linked polyethylene (PEX) tubing, which are standard in most modern homes, resist internal buildup far better than galvanized steel.
Partially Closed or Faulty Shut-Off Valve
Every kitchen sink has two angle stop shut-off valves (also called stop valves or supply valves) mounted on the water supply pipes under the sink cabinet, one for hot water and one for cold. These valves should be fully open during normal operation.
If a shut-off valve was closed for a repair and not fully reopened, or if the valve has a damaged stem washer or ball mechanism that prevents it from fully opening, flow will be reduced even when the handle appears to be in the open position. Compression-style shut-off valves are particularly prone to this issue as the rubber washer degrades over time and may partially block the valve seat even when the valve is theoretically open.
Turning the valve handle fully counterclockwise (for traditional stem valves) or ensuring the lever aligns with the pipe (for quarter-turn ball valves) and verifying free rotation is the first physical check to perform under the sink.
Failing or Worn Faucet Cartridge
The faucet cartridge is the internal valve mechanism that controls water flow and temperature inside the faucet body. In single-handle faucets, one cartridge manages both temperature mixing and flow. In two-handle faucets, each handle has a dedicated cartridge or stem assembly.
Cartridges are manufactured from ceramic disc, rubber, or brass and plastic composite materials. Over time the internal seals, O-rings, and disc surfaces wear down, crack, or become coated with mineral deposits. A worn or calcified cartridge can restrict flow even when the handle is fully turned to the open position.
Major faucet brands including Moen, Delta, Kohler, Pfister, American Standard, and Grohe all sell replacement cartridges specific to each faucet model. Identifying the brand and model number, typically found on the faucet body or in the original documentation, allows for an exact replacement without upgrading the entire faucet.
Low Pressure from the Main Water Supply
If the low pressure affects not just the kitchen sink but multiple faucets and fixtures throughout the home, the restriction is upstream of all individual fixtures. Possible causes include:
- The main shut-off valve (located where the water main enters the home) is partially closed
- The pressure reducing valve (PRV), also called a pressure regulator valve, has failed or is set too low
- There is low pressure from the municipal water supply itself, often caused by peak demand times, nearby construction, a water main break, or infrastructure issues
- A well pressure tank (in homes on private wells) has lost its charge or the well pump is failing
The PRV is a bell-shaped valve typically installed on the main supply line near the water meter. It reduces incoming street pressure (which can reach 150 PSI or more) to a safe household range. When the PRV diaphragm fails or the adjustment screw is miscalibrated, it can drop household pressure well below functional levels. PRVs have a typical lifespan of 7 to 12 years.
Kinked or Damaged Supply Hoses
The flexible supply hoses connecting the shut-off valves to the faucet inlets are a frequently overlooked restriction point. These hoses, typically made from braided stainless steel over a rubber or polymer core, or older chrome-plated copper, can develop internal kinks, collapse partially, or accumulate sediment at the connection ends.
A kinked supply hose under the sink cabinet, often caused by items stored under the sink pressing against the hoses, can cut flow significantly. Inspecting both supply hoses for sharp bends or compression is a simple visual check that takes under a minute.
Water Heater Issues Affecting Hot Side Pressure
Low pressure on only the hot water side at the kitchen sink can originate at the water heater itself. Sediment accumulation at the bottom of a tank-style water heater, a partially closed isolation valve on the heater inlet or outlet, or a failing dip tube can all reduce hot water pressure and volume at fixtures throughout the home.
In homes with a tankless water heater (such as models from Rinnai, Navien, Noritz, or Rheem), a clogged inlet filter screen on the unit can restrict hot water flow system-wide.
Shared Supply Line Pressure Drop
In multi-story homes or buildings where the kitchen sink shares a supply branch with other high-demand fixtures such as a dishwasher, refrigerator ice maker, or laundry connections, simultaneous use of multiple fixtures can cause a noticeable pressure drop at the kitchen faucet. This is known as pressure loss due to demand conflict and is an inherent characteristic of undersized supply lines rather than a component failure.
Step-by-Step Guide to Diagnosing and Fixing Low Kitchen Sink Water Pressure
Step 1: Test Pressure at Other Fixtures First
Before opening any cabinet or touching any pipe, run water at the bathroom faucet, the shower, and an outdoor hose bib. If pressure is normal everywhere except the kitchen sink, the restriction is localized to the kitchen. If all fixtures are weak, the problem is in the main supply, the PRV, or the well system.
Step 2: Remove and Clean the Aerator
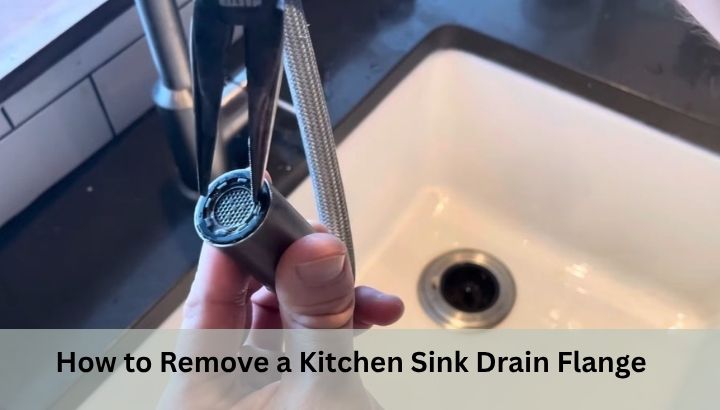
Use a pair of slip-joint pliers or groove-joint pliers wrapped in a cloth to unscrew the aerator from the spout tip. Most standard aerators use a 15/16-inch male thread or 55/64-inch female thread. Once removed, disassemble the aerator screen, flow restrictor, and housing. Soak all components in a bowl of white distilled vinegar for 30 to 60 minutes to dissolve mineral deposits. Scrub gently with an old toothbrush, rinse, reassemble, and reinstall. Test the flow. If pressure is significantly improved, the aerator was the culprit.
If the aerator screen is beyond cleaning due to heavy corrosion or physical damage, replace it. Universal replacement aerators from brands like Neoperl, Danco, or the original faucet manufacturer cost under $10 at hardware stores.
Step 3: Inspect the Shut-Off Valves
Open the cabinet under the sink and locate both shut-off valves on the supply pipes. Turn each valve handle fully to the open position. For compression/stem valves, turn counterclockwise until the handle stops. For quarter-turn ball valves, ensure the handle is parallel to the pipe. Run the faucet and test pressure after each valve adjustment.
If a valve is stiff, corroded, or fails to turn smoothly, it may need replacement. Replacing an angle stop shut-off valve is a straightforward repair requiring the main water supply to the home to be shut off temporarily.
Step 4: Check and Replace the Supply Hoses
Inspect both supply hoses under the sink for kinks, sharp bends, or signs of corrosion at the connection fittings. Disconnect the hoses from the shut-off valves and check for debris at the inlet end. Hold each hose up and look through it toward a light source; a visible internal restriction or collapsed center indicates replacement is needed.
Braided stainless steel supply hoses in standard 3/8-inch compression connection and 1/2-inch faucet thread sizes are available at hardware stores for $8 to $20. The industry recommendation is to replace supply hoses every 5 to 10 years as a preventive measure regardless of visible condition, as internal rubber liners degrade over time.
Step 5: Test and Replace the Faucet Cartridge
If cleaning the aerator and checking the valves does not restore pressure, the cartridge is the next component to address. Turn off the water supply at the shut-off valves under the sink. Remove the faucet handle by unscrewing the decorative cap and handle screw. Pull out the cartridge using a cartridge puller tool or pliers. Inspect for cracked seals, heavy mineral coating, or deformed O-rings.
Take the old cartridge to a hardware store or search the faucet manufacturer’s website using the model number to find the exact replacement. Brands like Moen (model 1225 or 1222 cartridges), Delta (RP46074 or RP19804 ball assemblies), and Kohler (GP30413 or GP77759 cartridges) have widely available replacement parts. Install the new cartridge following the manufacturer’s orientation diagram, reassemble the handle, and test the flow.
Step 6: Inspect and Adjust the Pressure Reducing Valve
Locate the PRV on the main supply line, typically near the water meter or where the main enters the home’s utility area. Attach a water pressure gauge (available from brands like Watts, Measureman, or Apollo) to a hose bib to get a baseline reading. If the reading is below 40 PSI, the PRV is likely the issue.
The PRV has an adjustment screw under a protective cap on top of the valve body. Turning the screw clockwise increases pressure; counterclockwise decreases it. Make small adjustments of one quarter turn at a time and recheck the gauge. If the PRV does not respond to adjustment or if pressure fluctuates erratically, the valve needs replacement. PRV replacement is a job best handled by a licensed plumber if you are not comfortable working near the main supply.
Step 7: Flush the Water Heater for Hot Side Issues
If only the hot side is affected, attach a garden hose to the water heater drain valve at the base of the tank, run it to a floor drain or outdoors, and open the valve to flush out accumulated sediment. For a thorough flush, turn off the cold inlet valve at the top of the heater, open a hot faucet in the house to relieve vacuum, and allow the tank to drain completely before closing the drain valve, reopening the inlet, and refilling. Annual flushing of tank-style water heaters extends their lifespan and maintains hot water pressure.
Comparison Table: Low Kitchen Sink Water Pressure Causes at a Glance
| Cause | Affects Hot, Cold, or Both | Other Symptoms | DIY Fix | Difficulty |
|---|---|---|---|---|
| Clogged aerator | Both | Uneven stream, visible crust | Clean or replace aerator | Very Easy |
| Mineral buildup in faucet body | Both | Gradual pressure drop over months | Descale or replace faucet | Easy |
| Partially closed shut-off valve | Hot or cold (one side) | One side weak only | Fully open valve | Very Easy |
| Worn faucet cartridge | Hot or cold (one side) | Dripping, uneven flow | Replace cartridge | Moderate |
| Failed PRV | Both (all fixtures) | Low pressure throughout home | Adjust or replace PRV | Moderate to Hard |
| Kinked supply hose | Hot or cold (one side) | One side weak, no other symptoms | Straighten or replace hose | Very Easy |
| Water heater sediment | Hot side only | Slow hot water recovery too | Flush water heater | Moderate |
| Galvanized pipe corrosion | Both (all fixtures) | Old home, chronic low pressure | Repipe with copper or PEX | Professional |
| Municipal supply issue | Both (all fixtures) | Neighbors affected too | Contact water utility | N/A |
| Shared line demand conflict | Both | Only during simultaneous use | Upsize supply lines | Professional |
Benefits of Restoring Proper Kitchen Sink Water Pressure
Restoring correct water pressure at the kitchen sink delivers practical improvements across daily tasks. Dishwashing and rinsing become faster and more thorough with adequate flow. Filling large pots for cooking, which is particularly critical in households that cook frequently, takes significantly less time. The garbage disposal operates more effectively with full water flow to carry waste through the drain properly.
From a plumbing health standpoint, consistently low pressure can indicate developing problems in the supply system that, if left unaddressed, lead to more serious failures. A blocked aerator, for instance, is a minor fix today but can contribute to a corroded faucet spout over time. A failing PRV that is not replaced can eventually fail open, exposing household pipes and appliances to damaging high-pressure surges above 100 PSI. Water hammer, which is the shockwave that occurs when high-pressure water flow is suddenly stopped, can crack pipe joints and damage appliance connections.
Addressing low pressure proactively also reduces water waste. A weak stream prompts users to run the faucet longer to accomplish the same tasks, which increases water consumption and utility costs.
Common Mistakes Homeowners Make When Fixing Low Kitchen Sink Pressure
Replacing the Entire Faucet Without Diagnosing the Actual Cause
A very common mistake is assuming a new faucet will solve low pressure and purchasing a replacement without first checking the aerator or shut-off valves. In the majority of cases, the faucet body itself is not the problem. Installing a brand-new faucet while the old clogged supply hose or partially closed valve remains untouched produces exactly the same low pressure in the new fixture. Always diagnose before replacing.
Using Chemical Descalers Directly in the Faucet Without Disassembly
Pouring undiluted citric acid or white vinegar directly into a running faucet to descale internal components without removing the aerator and cartridge is largely ineffective. The chemical does not reach all deposit surfaces and can damage rubber O-rings and seals inside the faucet body if left in contact for extended periods. Always disassemble and soak components separately for controlled, safe descaling.
Overtightening the Aerator During Reinstallation
After cleaning or replacing the aerator, many homeowners overtighten it with pliers, which cracks the plastic housing or damages the thread on older brass spouts. The aerator should be hand-tightened until snug and then given no more than a quarter turn with a cloth-wrapped tool. If it leaks after hand-tightening, check that the rubber washer is seated correctly before applying tool pressure.
Ignoring Pressure Issues That Affect Multiple Fixtures
When homeowners focus only on the kitchen sink while other fixtures in the house also have reduced pressure, they often perform unnecessary repairs at the sink while the real problem (a failing PRV or a main line issue) goes unaddressed. Always check at least two other fixtures before beginning sink-specific repairs.
Failing to Shut Off the Water Before Removing the Cartridge
Attempting to remove a faucet cartridge without first closing the shut-off valves under the sink results in immediate flooding under the cabinet when the cartridge is pulled. Always confirm both supply valves are fully closed and open the faucet briefly to release residual pressure in the lines before beginning any internal faucet work.
Frequently Asked Questions
Why is the water pressure low in my kitchen sink but normal everywhere else in the house?
If the water pressure is low only in your kitchen sink and normal at every other fixture, the restriction is isolated to that specific faucet and its immediate components. The most likely cause is a clogged aerator or mineral scale buildup inside the faucet body.
The second most common cause is a partially closed shut-off valve under the sink or a kinked supply hose. Remove the aerator and clean it first. If pressure is restored without the aerator installed, the aerator was the problem. If pressure is still low without the aerator, check the shut-off valves and supply hoses next.
Why is the water pressure low in my kitchen sink on the hot side only?
When low water pressure in your kitchen sink affects only the hot water side, the supply interruption is either in the hot-side shut-off valve, the hot supply hose, the hot inlet cartridge inside the faucet, or further upstream at the water heater.
Check that the hot-side shut-off valve under the sink is fully open first. If it is, inspect the hot supply hose for kinks. If both are fine, the problem is likely a worn cartridge on the hot side or sediment accumulation inside the water heater restricting outflow. Flushing the water heater and replacing the cartridge are the two targeted repairs for this scenario.
Can a clogged aerator really cause low water pressure in my kitchen sink?
Yes, a clogged aerator is the single most frequent cause of low water pressure at a kitchen sink faucet. The aerator screen has very fine mesh openings, and even a partial buildup of limescale, sand particles, or iron deposits across the mesh surface reduces flow dramatically.
Because the aerator sits at the end of the water path and is easy to inspect and clean, it is always the first component to check. Removing the aerator and testing flow without it takes under two minutes and immediately confirms or rules out this cause.
How do I know if my pressure reducing valve is causing low water pressure in my kitchen sink?
If the water pressure is low in your kitchen sink and also noticeably weak at other faucets, showers, and outdoor spigots throughout the home, a failing or miscalibrated pressure reducing valve (PRV) is a strong candidate. Confirm by attaching a water pressure gauge to an outdoor hose bib or the washing machine connection.
A reading below 40 PSI points to the PRV or the municipal supply. The PRV is a bell-shaped valve on the main supply line near the point of entry into the home.
Adjusting the lock nut and adjustment screw on the PRV can restore pressure; if the valve is older than 10 years and does not respond to adjustment, replacement is the recommended course of action.
Why did my kitchen sink suddenly lose water pressure?
A sudden drop in water pressure at your kitchen sink, rather than a gradual decline, points to a different set of causes than slow buildup. Sudden pressure loss is commonly caused by a shut-off valve being accidentally knocked partially closed, a supply hose that has developed a kink or internal collapse, a cartridge that has cracked or seized, or a municipal water supply interruption such as a water main break in your area.
Check the shut-off valves under the sink first. Then call your water utility to confirm there are no reported outages or main breaks in your neighborhood. If the utility reports normal service, proceed to inspect the supply hoses and cartridge.
Does low water pressure in my kitchen sink mean my pipes need replacing?
Not necessarily. The vast majority of low kitchen sink pressure cases are resolved by cleaning the aerator, adjusting a valve, or replacing a cartridge. Pipe replacement becomes relevant only when a home has galvanized steel pipes that are decades old and showing signs of severe internal corrosion and rust restriction across multiple fixtures simultaneously.
A plumber can assess the condition of internal pipe surfaces using a video inspection camera or by measuring flow rates at different points in the system. If the problem is isolated to the kitchen sink, pipe condition is almost never the cause.
How do I fix low water pressure in my kitchen sink caused by hard water?
Fixing low water pressure in your kitchen sink caused by hard water mineral buildup involves two approaches: removing existing deposits and preventing future accumulation. For immediate repair, clean or replace the aerator, soak the faucet cartridge in white vinegar, and flush the supply hoses.
For long-term prevention, consider installing a whole-house water softener (from brands such as Culligan, Fleck, GE Appliances, or Whirlpool) or an under-sink water filter with a scale inhibitor cartridge. A water softener exchanges calcium and magnesium ions for sodium ions through an ion exchange resin, effectively preventing limescale formation in pipes, faucets, and appliances throughout the home.
What PSI is considered normal for a kitchen sink faucet?
Normal household water pressure for a kitchen sink faucet falls between 40 PSI and 80 PSI, with 60 PSI being the widely recommended operating standard. The International Plumbing Code sets 80 PSI as the maximum safe static pressure for residential fixtures.
At 40 PSI and above, most kitchen faucets deliver adequate flow for all standard tasks. Below 40 PSI, tasks like filling large pots or rinsing dishes become noticeably slower. If a pressure gauge reading at the kitchen faucet connection is below 40 PSI while the rest of the home is normal, the issue is within the kitchen supply lines or faucet components.
Can a garbage disposal affect water pressure in my kitchen sink?
A garbage disposal unit does not directly cause low water pressure at the faucet, but a clogged or partially blocked disposal drain can create a backpressure effect that makes water appear to drain slowly and the faucet seem less effective.
Additionally, if the disposal installation disturbed the supply line connections under the sink or inadvertently caused a supply hose to kink, that physical change would reduce faucet pressure. Always inspect the supply hose routing under the sink after any garbage disposal installation or replacement to confirm no lines were displaced.
Conclusion
Low water pressure in your kitchen sink is a solvable problem in nearly every residential scenario. Starting with the simplest and most accessible component, the faucet aerator, and working systematically through the shut-off valves, supply hoses, faucet cartridge, and pressure reducing valve will identify and resolve the cause in most cases without professional help.
Homes with hard water benefit most from regular aerator cleaning and long-term investment in a whole-house water softener to prevent recurring mineral buildup.
When pressure is low throughout the entire home rather than just the kitchen sink, the PRV or the municipal supply is the starting point for diagnosis. Addressing the issue promptly protects your faucet components, reduces water waste, and ensures the kitchen operates at full efficiency every day.