
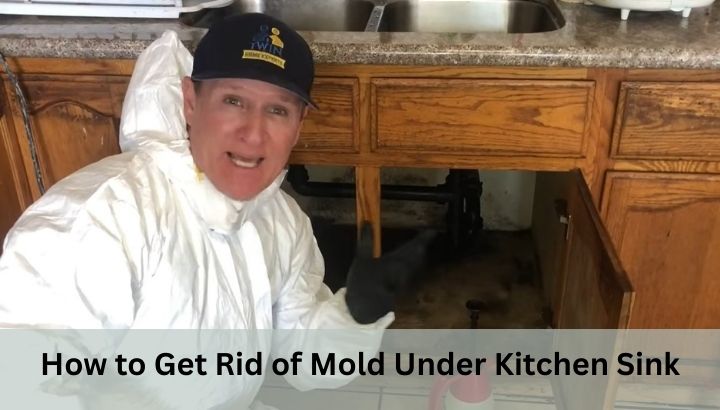
To get rid of mold under the kitchen sink, identify and fix the moisture source causing the mold, remove and discard all contaminated porous materials, clean all hard surfaces with a solution of one cup of unscented chlorine bleach per gallon of water or an EPA-registered mold-killing disinfectant, allow complete drying, and apply a mold-inhibiting primer or sealant to prevent regrowth. Mold under a kitchen sink will return within weeks if the moisture source is not eliminated before or during the remediation process.
Mold under the kitchen sink is one of the most common forms of indoor mold growth in residential homes, and it is also among the most consistently underestimated. Because the cabinet under the sink is dark, enclosed, rarely inspected, and often contains the most active plumbing in the kitchen, it creates near-perfect conditions for mold colonization.
Most homeowners discover it by accident while reaching for cleaning supplies, and many attempt partial treatments that address the visible growth without eliminating the conditions sustaining it.
This guide covers every aspect of mold under kitchen sink identification, safe removal, full remediation, and long-term prevention with all relevant products, tools, health considerations, and practical insights.
Understanding Mold Under the Kitchen Sink
Mold is a type of fungi that reproduces through airborne spores and grows by digesting organic material in its substrate. Unlike bacteria, mold forms visible mycelial colonies on surfaces when environmental conditions support growth.
The three requirements for mold colonization under a kitchen sink are moisture, organic substrate (wood, particleboard, paper-faced drywall, cardboard, or food residue), and temperatures between approximately 40 and 100 degrees Fahrenheit (4 to 38 degrees Celsius).
The under-sink cabinet almost always satisfies all three conditions simultaneously because of its enclosed construction, its plumbing connections, and the organic materials from which it is typically built.
Why the Under-Sink Cabinet Is Uniquely Vulnerable
The under-sink cabinet is structurally different from other kitchen cabinets in ways that make mold colonization significantly more likely. It has multiple pipe penetrations through the cabinet floor and back wall, each of which is a potential gap that admits humid air from the crawl space, basement, or wall cavity.
It contains the P-trap, supply lines, shut-off valves, and garbage disposal connections, any one of which can develop a slow drip that goes undetected for months in the dark, enclosed space.
The cabinet base is typically constructed from particleboard or medium-density fiberboard (MDF), both of which are manufactured from wood fiber and adhesive resins that absorb moisture readily and provide an ideal nutrient substrate for mold.
Unlike solid wood, these engineered wood panels swell, delaminate, and begin mold colonization much faster after moisture exposure. The back wall of the cabinet in many kitchens is either drywall or the cabinet’s own hardboard back panel, both of which are equally susceptible.
Common Mold Species Found Under Kitchen Sinks
Not all mold found under kitchen sinks is the same species, and identification matters because different species have different health implications and respond similarly to the same remediation methods.
Cladosporium is one of the most frequently found mold genera in indoor environments including under kitchen sinks. It appears as dark green, olive, or black colonies and grows on wood, painted surfaces, and fabrics. It is an allergenic mold that can trigger respiratory symptoms, skin irritation, and eye irritation in sensitive individuals.
Penicillium appears as blue-green or teal colonies with a powdery surface texture. It spreads rapidly on water-damaged wood and particleboard. Several Penicillium species produce mycotoxins and are associated with respiratory tract irritation and hypersensitivity reactions.
Aspergillus encompasses a large genus of mold species appearing in white, yellow, green, or black colonies. Some Aspergillus species, particularly Aspergillus fumigatus and Aspergillus niger, are classified as opportunistic pathogens that can cause serious respiratory infections in immunocompromised individuals. Aspergillus niger specifically produces the black mold growth commonly found on damp wood and particleboard in under-sink cabinets.
Stachybotrys chartarum, commonly known as black mold or toxic black mold, requires chronically wet cellulose-rich materials to grow and is found in under-sink cabinets where a slow leak has gone unaddressed for an extended period. It is dark black to dark greenish-black, has a slimy texture, and produces trichothecene mycotoxins that are associated with serious health effects including mycotoxicosis with symptoms including respiratory distress, neurological symptoms, and immune suppression. It is the mold species that most warrants professional remediation if found in large colonies.
Chaetomium is a less commonly known mold that grows on cellulose-rich materials under wet conditions. It has a white-to-gray appearance initially that darkens to brown-black as it matures and produces a musty, earthy odor. It is found on water-damaged particleboard and drywall in under-sink cabinets with chronic moisture problems.
Identifying the Moisture Source Before Remediation
Attempting to remove mold under the kitchen sink without first identifying and fixing the moisture source is the most common reason for mold recurrence. Every mold colony requires a moisture input to sustain growth. Remove the moisture and the mold dies and cannot return. Leave the moisture source in place and the mold regrows within two to eight weeks regardless of how thoroughly it was killed during cleaning.
Slow Plumbing Leaks
The most common moisture source sustaining mold under a kitchen sink is a slow plumbing leak that delivers small amounts of water continuously rather than the dramatic drip that would be noticed immediately. Check each of the following components carefully with dry hands and a dry cloth:
The P-trap slip-joint nuts where the curved trap section connects to the drain tailpiece and the branch drain are the most common slow-drip locations. Even a connection that appears tight can develop a hairline gap at the slip-joint washer over time.
The supply line compression fittings at the shut-off valve connections are another frequent leak point, particularly on older braided rubber supply hoses whose inner rubber lining deteriorates and develops pinholes that produce a slow seeping dampness.
The shut-off valve stems themselves can drip at the packing nut when the valve has not been operated in years and the packing material dries out.
Condensation on Cold Water Pipes
In kitchens with high indoor humidity, particularly in warm climates or during summer months, the cold water supply pipes under the sink can develop condensation on their outer surface.
Cold pipe surfaces cause water vapor in the warm cabinet air to condense as liquid water, which drips onto the cabinet base and creates a chronic moisture source even without any plumbing leak. This source is easy to overlook because it produces no visible drip from a fitting and the pipe surface looks simply wet rather than obviously leaking.
Pipe insulation sleeves made from closed-cell polyethylene foam or neoprene rubber (available from Frost King, Armacell, and store brands) installed on the cold supply pipes eliminate condensation by bringing the outer pipe surface temperature above the dew point of the cabinet air.
Deteriorated Sink Rim Caulk
A failed or missing caulk bead at the junction between the sink rim and the countertop allows water that pools around the sink basin to seep under the countertop surface and drain through the countertop substrate into the cabinet interior below.
This moisture source is entirely exterior to the plumbing system and is easily missed because the water appears to come from nowhere inside the cabinet. Inspect the entire perimeter caulk bead around the sink rim from above for gaps, cracks, separation, or missing sections.
High Indoor Humidity Without Active Leaks
In some cases, particularly in kitchens without adequate ventilation, high indoor relative humidity above 60 percent is sufficient to sustain mold growth on the organic surfaces of the under-sink cabinet even without any localized leak or condensation source.
The U.S. Environmental Protection Agency (EPA) recommends maintaining indoor relative humidity between 30 and 50 percent to prevent mold growth in enclosed spaces.
A hygrometer (digital humidity meter) placed inside the cabinet measures relative humidity accurately and confirms whether ambient humidity is a contributing factor.
Tools and Materials Required to Get Rid of Mold Under Kitchen Sink
Assembling the correct personal protection equipment and cleaning materials before starting is both a safety requirement and a practical efficiency measure.
Personal protective equipment (PPE):
- N95 respirator mask or higher, such as an N100 respirator (standard surgical masks do not filter mold spores effectively; the 3M 8210 N95 and 3M 8511 N95 are widely available options)
- Safety goggles or protective eyewear with side shields to prevent spore exposure to eyes
- Nitrile gloves (not latex, as some individuals have latex allergies) extending at least to mid-forearm
- Disposable coveralls or old clothes that can be immediately laundered or discarded after the job
Cleaning and remediation tools:
- Stiff-bristle scrub brush for hard surface scrubbing
- Old toothbrush for detail cleaning in corners and crevices
- Sponges (to be discarded after use)
- Spray bottles for applying cleaning solutions
- Heavy-duty contractor garbage bags (6 mil thickness) for sealing and disposing of contaminated porous materials
- Box fan or portable ventilation fan to direct air out of the work area
- Shop vacuum with HEPA filter for cleaning up debris without dispersing spores
Cleaning and treatment products:
- Unscented chlorine bleach (sodium hypochlorite, 5.25 to 8.25%) such as Clorox Regular Bleach or Clorox Concentrated Bleach
- White distilled vinegar as an alternative for surfaces where bleach is not appropriate
- Hydrogen peroxide (3% solution) as a non-bleach alternative
- Concrobium Mold Control (active ingredient: sodium carbonate, sodium bicarbonate, and trisodium phosphate), an EPA-registered mold control and preventive product
- RMR-86 Instant Mold Stain Remover for removing mold staining from porous wood surfaces after killing
- Zinsser Mold Killing Primer or Kilz Mold and Mildew Primer for post-remediation surface sealing
- Dehumidifier such as models from Frigidaire, hOmeLabs, Keystone, or GE Appliances for drying the cabinet area
- Silicone caulk such as GE Sealants Advanced Silicone 2 Kitchen and Bath for re-sealing pipe penetrations and sink rim
Step-by-Step Guide to Get Rid of Mold Under Kitchen Sink
Step 1: Put on Personal Protective Equipment and Ventilate the Area
Before opening the cabinet door or touching anything inside, put on your N95 respirator, safety goggles, and nitrile gloves. Opening the cabinet door disturbs mold colonies and releases a plume of airborne spores that you should not inhale. Open a nearby kitchen window and position a box fan to exhaust air outward through the window, creating a negative pressure that draws air out of the work area rather than allowing spore-laden air to circulate into the rest of the home. Turn off any HVAC system returns in the kitchen to prevent spores from being distributed through the ductwork.
Step 2: Empty the Cabinet and Remove All Items
Remove every item stored in the cabinet and place them outside the kitchen temporarily. Inspect each item for mold growth. Items with visible mold that are porous and cannot be fully cleaned, such as cardboard boxes, paper bags, sponges, old cloth bags, and similar materials, should be placed directly into a sealed contractor bag for disposal. Hard items such as bottles, cans, and plastic containers with surface mold can be cleaned with a diluted bleach solution and rinsed.
Step 3: Photograph the Mold Colony and Assess the Extent
Before cleaning anything, photograph the mold growth thoroughly from multiple angles. This documentation is important for assessing whether the area falls within the EPA’s DIY remediation guideline of 10 square feet or less of visible mold growth. The EPA’s guidelines in Mold Remediation in Schools and Commercial Buildings (EPA 402-K-01-001), widely applied in residential contexts, recommend that mold areas larger than 10 square feet (roughly 3 feet by 3 feet) be handled by a professional mold remediation contractor rather than a DIYer.
If the mold is only on the cabinet surfaces and is less than 10 square feet, DIY remediation is appropriate. If the mold has penetrated the back wall into the wall cavity, extends along floor joists, or involves extensive particleboard swelling and delamination suggesting months of moisture exposure, professional assessment by a certified indoor environmental professional (CIEP) or a certified mold inspector is recommended before proceeding.
Step 4: Fix All Moisture Sources Completely
Before applying any cleaning product, fix every moisture source identified in Step 1 of the diagnosis. Replace leaking supply hoses with new braided stainless steel supply hoses with PTFE-lined inner cores. Tighten or replace leaking P-trap slip-joint connections with new slip-joint washers and properly seated nuts. Replace a leaking shut-off valve entirely rather than attempting temporary tightening. Apply closed-cell foam pipe insulation to cold water pipes if condensation was identified. Re-caulk the sink rim perimeter with fresh 100% silicone caulk if the existing bead was failed.
This step is non-negotiable. All other steps are wasted effort if the moisture source remains active.
Step 5: Remove All Porous Materials That Cannot Be Fully Cleaned
Porous materials with mold growth cannot be reliably decontaminated by surface cleaning because mold hyphae penetrate into the material’s interior beyond the reach of topical cleaning solutions. This includes:
- Particleboard or MDF cabinet base panels with visible mold growth or swelling that indicates moisture penetration
- Hardboard or paper-faced cabinet back panels with mold growth
- Paper-faced drywall if the cabinet back wall has been affected
- Cardboard or paper liners in the cabinet
- Any fabric, rubber mat, or foam items that have mold growth
Cut away and remove affected sections of the cabinet base and back panel using a utility knife or circular saw (wear full PPE during cutting, as cutting increases spore dispersal dramatically). Place all removed materials directly into heavy-duty contractor bags, seal the bags tightly, and remove them from the home for disposal. Do not carry unsealed bags through the living areas of the home.
Step 6: Clean All Hard Surfaces with Mold-Killing Solution
For all remaining hard surfaces, including the intact cabinet frame members, plumbing pipe surfaces, the underside of the countertop if accessible, and any adjacent wall surfaces, apply the mold-killing cleaning solution.
Bleach solution method: Mix one cup (approximately 240 ml) of unscented sodium hypochlorite bleach into one gallon (approximately 3.8 liters) of water. Apply with a spray bottle or sponge, ensuring thorough surface wetting. Allow a minimum contact time of 10 minutes before scrubbing with the stiff-bristle brush. Work from the outer edges of the mold colony inward to avoid spreading spores to unaffected areas. Rinse with clean water and repeat if any mold discoloration remains.
Vinegar method (for surfaces where bleach is not appropriate): Apply undiluted white distilled vinegar directly to the moldy surface. Allow it to sit undisturbed for a minimum of one hour. The acetic acid in vinegar at 5% concentration kills approximately 82% of mold species on contact, according to research cited by the American Chemical Society. Scrub and wipe clean. Vinegar leaves a residual acidity on the surface that continues to inhibit mold regrowth after the cleaning event. Vinegar is preferred over bleach on natural wood surfaces, as bleach can raise the wood grain and bleach the color, and also wherever chemical fumes are a concern.
Hydrogen peroxide method: Apply 3% hydrogen peroxide solution (standard pharmacy grade) to the affected surface, allow a 10-minute contact time, then scrub and wipe. Hydrogen peroxide is an oxidizing biocide that kills mold, bacteria, and viruses on contact and leaves no toxic residue.
Concrobium Mold Control: This EPA-registered product works by encapsulating mold cells as it dries, physically crushing the spore and mycelium structure. It is applied to the surface and allowed to dry without rinsing. It provides ongoing mold prevention in addition to killing active colonies.
Step 7: Dry the Area Completely
After cleaning, the area must be dried to absolute dryness before any reconstruction or sealant application. Use a portable dehumidifier placed inside or adjacent to the cabinet, a box fan directing air through the cabinet, or a heat gun on a low setting to accelerate surface drying. The cabinet and all treated surfaces must reach below 15 percent moisture content (measurable with a pin-type moisture meter from brands including General Tools, Ryobi, or Klein Tools) before proceeding. This typically takes 24 to 72 hours depending on conditions and the extent of the prior moisture damage.
Step 8: Apply Mold-Inhibiting Primer or Sealant
Once surfaces are fully dry, apply a mold-inhibiting primer such as Zinsser Mold Killing Primer, Kilz Restoration Maximum Stain and Odor Blocking Primer, or KILZ Mold and Mildew Primer to all treated wood and wall surfaces inside the cabinet. These products contain mold inhibitors that continue to suppress mold colonization on the treated surface for years after application. Allow the primer to dry completely per the manufacturer’s instructions before replacing cabinet base panels and restoring the cabinet interior.
Seal all pipe penetrations through the cabinet floor and back panel with 100% silicone caulk or expanding polyurethane foam sealant (such as Great Stuff Big Gap Filler) to eliminate air infiltration paths that introduce humid air from below the floor into the cabinet interior.
Comparison Table: Mold-Killing Solutions for Under-Sink Remediation
| Solution | Active Agent | Kill Efficacy | Safe for Wood | Fumes / Hazard | Prevents Regrowth | Best For |
|---|---|---|---|---|---|---|
| Bleach solution (1:16 dilution) | Sodium hypochlorite | Very High (99%+) | Caution (discolors) | Moderate fumes | Temporary | Non-porous hard surfaces |
| Undiluted white vinegar | Acetic acid 5% | High (approx. 82%) | Yes | Mild | Yes (residual acidity) | Natural wood, all surfaces |
| Hydrogen peroxide 3% | Oxidizing biocide | High | Yes | None | Moderate | All surfaces, low-odor |
| Concrobium Mold Control | Sodium carbonate blend | High | Yes | None | Yes (encapsulation) | Prevention + killing combined |
| RMR-86 Mold Stain Remover | Sodium hypochlorite (higher conc.) | Very High | Caution | Strong fumes | No (stain removal only) | Stain removal after killing |
| Tea tree oil solution | Terpinen-4-ol | Moderate | Yes | Mild | Yes | Small areas, natural treatment |
| Borax solution (1 cup per gallon) | Boric acid | High | Yes | Minimal | Yes | Natural, wood-safe treatment |
| Zinsser Mold Killing Primer | Quaternary ammonium compound | High | Yes | Mild | Yes (long-term) | Post-cleaning preventive coating |
| Professional fogging agent | Various biocides | Very High | Varies | Strong (ventilation required) | Yes | Large infestations, professional |
Health Risks of Mold Under Kitchen Sink and When to Call a Professional
Health Effects of Mold Exposure
Mold under the kitchen sink is not a cosmetic problem. The Centers for Disease Control and Prevention (CDC) and the EPA both acknowledge that indoor mold exposure is associated with a range of adverse health effects. Mold spores and mycotoxins are inhaled or come into contact with skin and eyes during normal kitchen use, particularly when the cabinet is opened and air currents disturb the mold colony.
Allergenic effects are the most common health response, affecting individuals with existing allergic rhinitis, asthma, atopic dermatitis, or mold hypersensitivity. Symptoms include sneezing, runny nose, red and itchy eyes, skin rash, and worsening asthma. The American Academy of Allergy, Asthma and Immunology (AAAAI) identifies indoor mold as a significant trigger for asthma exacerbations in sensitized individuals.
Irritant effects occur even in non-allergic individuals through direct contact with mold spores or mycotoxins. Symptoms include throat irritation, coughing, wheezing, nasal congestion, and eye irritation.
Toxic mold effects from species that produce mycotoxins, particularly Stachybotrys chartarum, include more serious symptoms including persistent coughing with blood, severe fatigue, headaches, and in high-exposure situations, neurological symptoms. The Institute of Medicine (IOM) review Damp Indoor Spaces and Health (2004) provides a comprehensive analysis of the health literature on indoor mold exposure.
When to Call a Professional Mold Remediation Contractor
Call a certified professional mold remediation contractor (such as those certified by the Institute of Inspection, Cleaning and Restoration Certification (IICRC) under the S520 Standard for Professional Mold Remediation) when:
- The visible mold area exceeds 10 square feet
- Mold is present in the wall cavity behind the cabinet back panel
- Stachybotrys chartarum (black mold with a slimy texture) is suspected or identified
- Any household member has respiratory conditions, immune suppression, or is undergoing chemotherapy or immunosuppressive therapy
- The mold has been present for an extended period and structural wood framing may be compromised
- Multiple mold colonies are present in different areas of the kitchen simultaneously
Common Mistakes When Getting Rid of Mold Under Kitchen Sink
Cleaning Mold Without Fixing the Moisture Source
The most destructive mistake in under-sink mold remediation is cleaning the visible mold with bleach or vinegar, declaring the job done, and closing the cabinet. Without moisture source repair, the mold colony re-establishes itself in the same location within two to four weeks because all the conditions for growth remain in place. Every remediation effort that does not begin with moisture source identification and repair is temporary cosmetic treatment rather than remediation.
Using Bleach on Porous Materials Such as Wood and Particleboard
Chlorine bleach solution does not penetrate porous materials effectively. The water carrier soaks into the wood or particleboard, but the sodium hypochlorite active ingredient remains on the surface because its molecular properties prevent deep penetration.
The result is that bleach kills surface mold on wood while leaving the mold hyphae inside the material alive and intact. The treated wood appears clean temporarily but the colony regrows from the interior within weeks.
Vinegar, hydrogen peroxide, and borax solution are more appropriate for porous wood surfaces because their smaller molecular size allows better penetration into the material.
Not Using Adequate Personal Protective Equipment
Cleaning mold under the kitchen sink without an N95 respirator and eye protection exposes the person performing the remediation to the highest concentration of airborne spores of the entire mold exposure event, because physical cleaning and scrubbing releases spores in large quantities.
A standard dust mask or surgical mask does not filter particles at the sub-micron size of many mold spores (which range from approximately 1 to 100 microns but many species release spores in the 2 to 10 micron range requiring true respirator filtration).
Eye protection is equally important because mold spores contacting the mucous membranes of the eye can cause conjunctivitis and, in cases of Aspergillus or Fusarium species, more serious ocular infections.
Leaving Contaminated Debris in Open Bags Inside the Home
Removing moldy particleboard, cabinet panels, or contaminated materials and placing them in open or loosely closed bags inside the home while cleaning continues allows spores from the removed material to disperse throughout the living space.
All contaminated materials must go directly into sealed, heavy-duty contractor bags the moment they are removed from the cabinet, and those bags should be removed from the home as quickly as possible rather than staging in the kitchen or other interior spaces.
Applying Mold Primer Without Achieving Complete Dryness First
Mold-inhibiting primer applied over a surface that is still above its equilibrium moisture content will trap residual moisture beneath the primer layer, which can sustain mold growth between the surface and the primer coating.
Always verify using a pin-type moisture meter that the treated wood surfaces have reached below 15 percent moisture content before applying any primer or paint coating. Primer applied over damp wood will also fail to adhere properly, peeling or blistering within months as the trapped moisture escapes.
Frequently Asked Questions
Is mold under the kitchen sink dangerous to my family’s health?
Mold under the kitchen sink is a genuine health concern, not just a cosmetic problem. Mold spores and mycotoxins produced by species including Cladosporium, Penicillium, Aspergillus, and Stachybotrys chartarum are released into the kitchen air every time the cabinet is opened or air currents disturb the colony.
The CDC and the EPA both acknowledge that indoor mold exposure causes allergenic reactions, respiratory irritation, and in susceptible individuals with asthma, mold allergies, or immune suppression, more serious health effects.
Young children, elderly individuals, pregnant women, and immunocompromised household members face higher health risks from mold exposure. Address mold under the kitchen sink promptly rather than monitoring it over time.
What kills mold under a kitchen sink most effectively?
The most effective agents for killing mold under a kitchen sink depend on the surface type. For non-porous hard surfaces (metal pipes, cabinet frame wood, painted surfaces), a diluted sodium hypochlorite bleach solution (one cup per gallon of water) with a 10-minute contact time kills most mold species at over 99 percent efficacy. For porous wood surfaces such as exposed cabinet wood, undiluted white distilled vinegar or a borax solution (one cup per gallon of water) are more effective because they penetrate the surface rather than remaining on it.
Concrobium Mold Control is an EPA-registered option that kills and prevents regrowth on all surface types. For stain removal after killing, RMR-86 Instant Mold Stain Remover removes the discoloration that remains on wood surfaces even after the mold is killed.
Can I get rid of mold under the kitchen sink myself or do I need a professional?
You can get rid of mold under the kitchen sink yourself when the visible mold area is 10 square feet or less, the mold has not penetrated into the wall cavity, no household members have respiratory conditions or immune suppression, and you can identify and fix the moisture source.
Wear full PPE including an N95 respirator, safety goggles, and nitrile gloves, remove and discard all porous contaminated materials, clean hard surfaces with bleach or vinegar, dry completely, and apply mold-inhibiting primer.
Call a certified IICRC-certified mold remediation contractor when the area exceeds 10 square feet, when Stachybotrys chartarum (black mold) is present in quantity, or when mold has spread into the wall cavity behind the sink.
Why does mold keep coming back under my kitchen sink after I clean it?
Mold that returns under the kitchen sink within weeks of cleaning is receiving an active moisture supply that was not identified or repaired before the cleaning. The most common overlooked moisture sources causing recurring mold are a slow drip at the P-trap slip-joint nuts that is too slow to notice as individual drops, condensation on cold supply pipes that creates chronic dampness without any fitting leak, a failed sink rim caulk bead allowing water to seep through the countertop, and gaps around pipe penetrations in the cabinet floor or back wall allowing humid air from the sub-floor or wall cavity to enter the enclosed cabinet space. Address every moisture source completely before cleaning and the mold will not return.
How do I know if the mold under my kitchen sink is toxic black mold?
Stachybotrys chartarum, the species associated with the most serious health effects and commonly called toxic black mold, has specific appearance characteristics that distinguish it from other dark-colored molds. It is characteristically dark black to dark greenish-black, has a slimy or wet texture (unlike the dry, powdery surface of Aspergillus niger which is also black), and grows exclusively on cellulose-rich materials that have been chronically wet for extended periods.
It is not found on occasional brief moisture exposure surfaces. If the mold under your kitchen sink is black and slimy, has been growing for an extended period, and the area is larger than a few square feet, professional mold testing by a certified indoor environmental professional (CIEP) using air sampling and surface sampling with laboratory analysis provides a definitive identification.
However, from a practical remediation standpoint, all black mold under a kitchen sink should be treated with full PPE and professional assistance should be sought for larger infestations regardless of species identification.
What is the best way to prevent mold from growing under the kitchen sink?
The best way to prevent mold under the kitchen sink combines structural measures with regular inspection habits. Fix any plumbing leak the moment it is discovered rather than placing a container under it. Apply closed-cell foam pipe insulation to cold water supply lines to eliminate condensation.
Re-caulk the sink rim annually or whenever the caulk bead shows cracks or separation. Seal all pipe penetrations through the cabinet floor and back panel with silicone caulk or expanding foam sealant. Inspect the under-sink cabinet interior once per month with a flashlight, feeling the cabinet base and back panel for any dampness.
Apply Concrobium Mold Control preventively to the cabinet interior surfaces once per year, particularly at the beginning of summer when outdoor humidity is highest. Install a small rechargeable dehumidifier designed for enclosed spaces, such as Eva-Dry Mini Dehumidifier units, inside the cabinet to maintain low humidity in the enclosed space between plumbing service events.
Can I paint over mold under the kitchen sink to cover it?
No. Painting over mold under the kitchen sink does not kill the mold colony and does not stop its growth. Standard paint, even paint marketed as mold-resistant, applied directly over active mold does not stop the mycelium from continuing to grow beneath and eventually through the paint layer.
The paint may hide the visual appearance temporarily but the colony continues to decompose the substrate and release spores, and the paint will eventually show bubbling, peeling, or re-emerging discoloration as the mold grows through it.
The correct sequence is always to kill the mold completely, verify dryness, and then apply a mold-inhibiting primer such as Zinsser Mold Killing Primer over the cleaned and dried surface as a preventive barrier, not as a covering for active growth.
How long does it take to get rid of mold under a kitchen sink completely?
Getting rid of mold under the kitchen sink completely takes between one and three days for a DIY remediation of a standard-sized affected area. The repair of the moisture source may take an additional day if plumbing parts need to be ordered or if a plumber is needed for shut-off valve replacement.
The mold cleaning treatment itself requires several hours of active work. The mandatory drying period before primer application takes 24 to 72 hours depending on the extent of prior moisture damage and the airflow achieved with fans and dehumidifiers.
The primer application and curing takes an additional 4 to 24 hours per coat. Total elapsed calendar time from discovery to fully remediated and re-sealed cabinet is typically three to five days for a contained, single-source moisture problem with less than 10 square feet of affected area.
Conclusion
Getting rid of mold under the kitchen sink is a structured process that begins with moisture source identification and ends with surface sealing, and every step in between matters for achieving a permanent result rather than a temporary cosmetic improvement.
Fixing the plumbing leak, condensation source, or failed caulk that is sustaining the mold is the single most important action in the entire remediation. Using the right killing agent for the surface type, whether bleach for non-porous surfaces, vinegar or borax for porous wood, or an EPA-registered product like Concrobium for all-surface treatment with built-in prevention, determines whether the cleaning is effective at depth or only at the surface.
Completing the job with mold-inhibiting primer, sealed pipe penetrations, and a regular monthly inspection habit converts a previously vulnerable cabinet into a maintained, mold-resistant space that does not require repeat remediation.